Thursday, December 19, 2019

Garden Planning

It has been a couple of years since I blogged -Just have been too busy! But I have continued to garden!  So now it is winter and the garden is at rest.  But to catch everyone up here are some photos and information about what we have been doing the past several years with the gardens!

The garden out back of our home has advanced with a few new boxes.  We have had 4 boxes that are 4 foot by 8 foot for some time now .  A couple of years back we put in a box that is 1 foot wide and the full length of the fence. (you can see it in the photo below). 


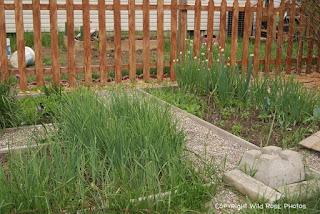
On the other side of the fence is my older garden that had pea gravel all around the boxes. (see in the 4 photos below).  I have found that as I get older, it is too difficult to weed that one.  The space between the rows is too narrow to work with.  My plan is to turn this one into a permanent flower garden that will take care of itself (perennials with lots of mulch and hopefully not a lot of weeding to do!). Right now it is full of weeds and needs a huge amount of time (not shown in the photos) so it will take about a full day to weed it and clean them up then plant some flowers this spring!  these were the very first lined beds we did here on our farm.


Notice how young our fend is in the photos above!


Here is the second garden  we did that was permanent beds/boxes. (see below)
We began with 3 boxes and added 3 more. Mowed the grass around them until finally putting down weed block and mulch over that.  Then added a fence around them (to keep the deer out).
All of that took about 3 years to finish. 


There are 6 boxes now in all.  This was the first how it looked.  4 foot by 12 foot. 
Then the next year we added the ground cover and mulch. 


Now we have brick started in the very center of the 6 boxes going  from the entry way to across between the 6.  Each year we add more bricks (a little at a time as we can afford it).  I wish we could find some of them for free but they are swiped up fast around here! You can see the grape vine in the far box, and berries in the other two.  And rhubarb.   


We have begun asparagus in one other box and plan to use the other two for various seasonal items.  The posts that are taller are part of a arbor.  (See photos below...)


We also fenced in this garden (as we are doing all of them) due to the deer population we have around here. 
Here is our garden with new mulch down (the one behind our house).  This is the one we grow most of our seasonal veggies in.  (annuals).  We are going to expand with one or two boxes this spring in this area.  Notice the aging fence!


So now we need to plan what to plant.  I have told you our plans for the others already, so in this one we plan to do the following.  Two new arbors up going from the boxes to the fence.  We will have climbing peas on one and pole beans on the other one. 
On our new boxes we will also have a couple of arbors to support cucumbers. 
we will also plant the following: bush beans, carrots, beets, cabbage, lettuce, basil, rosemary, tomatoes, zucchini, radishes, onions, stevia, marigolds, and maybe squeeze in a few more items.  From these boxes we will use the produce to eat this summer.  For canning we often purchase from a local farmer who raises organic items.  I do not have the time to grow that much anymore and I want to support the small local farms/farmers. 

I try to save my seeds but when I need to purchase some, I buy from bakers seeds.  Most of the time I have good success but have had some not grow well. 

This spring we will need to add new compost to our boxes as they are very depleted. We need to make them taller also but may wait a year or so as if we do not sell this mini farm, and chose to stay, we may build a new garage in this area and move the gardens behind the house to another area. Not sure yet!



Saturday, February 20, 2016

New information if you follow this or other blogs

From the blog people

We encourage you to tell affected readers (perhaps via a blog post), that if they use a non-Google Account to follow your blog, they need to sign up for a Google Account, and re-follow your blog. With a Google Account, they’ll get blogs added to their Reading List, making it easier for them to see the latest posts and activity of the blogs they follow.

Sunday, May 25, 2014

Gardening season begins!


There is new mulch in the boxes and new saw dust-wood shavings around the boxes.
                                                Well gardening season is here!  Yea!

                           I enjoy gardening and mowing the lawn, it is a way for me to relax.

For those of you who may not know or remember, I have designed my garden beds to be easier on me when I am older.  IF we are still in this home!  This way I can add boards to make the boxes taller so I will not have to bend as far when working in them.  Also the 'rows' are wider, so they would eventually- if needed- accommodate a wheelchair or walker! (we would need to add cement in the rows so they are smooth for this) Not that I am planning on being in a wheelchair, but you never know where life will take us!
these are the boxes out in the yard, in the beginning when there was only 3 and lots of grass growing around them!

we added more boxes each year, as well as organic mulch

this is after we added organic mulch on top of new topsoil 

this is how the sawdust comes packaged.  We spend $3.75 for one,  plus tax, and it covers about a 2-1/2 foot wide by about 8-12 feet long space -and about 3-4 inches deep.  If you're putting down new ground cover and mulch like this for the first time, I would plan to use more than the above ratio to help kill the weeds that first year.  The first time on my gardens, I put the mulch on double  thickness.  It was worth the extra cost, and worth it to avoid the weeds and grass weeds sneaking into the garden!

There are now 6 boxes in this area, (took a few years to get to this point) and you can see the saw dust between the boxes.  We now have saw dust around the outer edge of the boxes too, and a fence up to keep the deer and rabbits and other  animals out! These photos above were taken a couple of years ago.
I have now 6 boxes out in the yard, a garden area there.  As you can see above on the photos.  Below is a photo taken this year, after 2-3 years the saw dust breaks down enough to use as mulch.  So one of the things I am working on this spring is putting the old saw dust that is now soil- that is currently in between the boxes on the path we walk on, putting all of that into the boxes and redoing the saw dust with new sawdust.  Scott is bringing me compost from the barn yard animals, to also place in the boxes.   The combo of organic new soil and organic barn yard mulch makes for a great rich soil for the new plants! 

one of the 6 boxes this spring before we weeded it and removed the soil between the boxes

you can see here, I have removed the soil between the boxes you can also see the fence up around the garden too.  Someday we will replace the posts which are metal, with nice wooden ones and make it a bit fancier!  For now, it serves the purpose!

and new mulch is down!

 I have 5 boxes along the driveway, that have pea gravel in the rows between the boxes.  They are 4 foot wide and 8 foot long.  I have weeded 2 and a half of those, so I have some more work to do there.  I also have planted some veggies in 2 of those, one box has the cilantro coming up (it is organic and heirloom so comes up on its own each year-and replaces itself all summer long) and one box has garlic and strawberries which are both doing well.  (need more strawberry plants though!)  I plan to fill at least 2 or maybe three of these boxes with strawberries, and keep the chives that are growing (see the taller plants in the box with purple flowers) and continue to plant lavender also (I have about 3 lavender plants here).


Then behind the house I have 4 boxes which are also 4 foot wide, and 8 feet long.  I have a spot for green beans, that grow on vines, (see photo below) that will grow up on the fence that is arched over to the wooden fence, and also will plant many bush beans here.  I put the peppers here, some of them, as well as some onions, radishes, and some beets.  I plant root veggies with veggies that are producing above ground to save space.  So there will be green beans that will be growing on the vine and up the fence you see in the photo, that box also has about 15 to 18 pepper plants and 4 more pepper plants from seed, about 30 sweet onions, and also radishes.  I got a lot planted in that box!


My volunteer tomatoes come up each year in these boxes too, cherry and grape ones.  (again, I am trying to switch over to all veggies being heirloom so I can save the seed --also organic.)  When I was growing up -we had to save seeds for the next year, we also had plants that had to be pollinated, so I know how to do that too.  Once the hybrids came out, they marketed them as to make our lives easier in the garden, many of us-our family included, jumped on that band wagon, because they said many of the plants were resistant to rot, bugs, etc...We had no idea how toxic all of this would be to our bodies.

tomato horn worm that was covered with wasp larva that was found in my garden another year.  The larva will hatch and the new worms will eat the tomato hornworm, but not its vital organs until last.  so the worm does not even know the danger it is in until its too late.  Nature (GODs design) at work!

Now I do not mind going out and removing bugs from the garden, there are also several things you can do to help avoid bugs on your plants.  And GOD has a design (see above photo) for most pests to a garden.  The tomato hornworm is a moth in the larva stage, it has a purpose in life, but to a vegetable garden, it can destroy tomatoes fast!

Gardening is a little bit of work, but it is a healthy thing to do and it is also relaxing so I do not mind.  We always keep a couple of chairs in each garden area, so scott can come and sit and talk with me while I work, or we can just sit there together -he enjoying a cup of coffee and me a cup of tea, and talk.  Its peaceful! (photo below taken a few years ago)
the chair also works well to hold the sprinkler! that keeps the chair clean too! 

Tuesday, June 18, 2013

Recycling

I love to recycle things-now.  When I was young, I thought you had to have new things.  I thought things had to look really good, and reusing things for another reason other than what they were designed for-was not an option then.  Recycling then ---was plastic bottle, glass and stuff like that.

 But today, with a small farm-I recycle a lot of stuff.  I no longer need to have things look just so...perfection like that, I do think it is prideful.  It does not mean you have to be sloppy, but to waste things that could be used elsewhere, is wrong.  It is not being a good steward.
So here are some of our recyclable things around the farm!

Her is one of 2 gates to one of my gardens that is made out of trimmed branches from bushes that actually grow right beside the garden!  Each year I have to trim the bushes, and can reuse the branches for things like this, or we will use them to be kindling for fires.
Below is the other gate.


I have a close line that begins right out my back door, with that end on the house and the other end on the garage.  Both ends have rollers, so the close line --I can pull it (rolling) to hand the clothes.  
this photo is really grainy, but it shows the other roller...

and yes, that if twine that is used on the farm!  My other line broke (regular close line) and I need to go to a special store to get a replacement one long enough! 


This is currently a gate to another garden.  It use to be the side of a crib.


Here is the gate, to the chicken yard.  The bottom is an old crib bed  spring.  The top is lattice board.  (yes a double gate) we sometimes keep the lattice board one open and keep the crib spring closed.  The black 'belt' holding the gate closed, is an old large dog collar. (hinges are on the other side) 

this shelf, is a wire shelf that use to  be in our house.  It fits in a corner, we used it for a number of years, then spray painted it and used it at our oldest sons wedding--it works now in the garden to allow the peas to grow up on! It is about 4 feet tall and has 3 of the shelves like you see here---

well that is it for now!  


Gardens---Vegetable gardens!

Gardening!  I love gardening!
We moved in here one day  before Thanksgiving in 1997.  We have been working on this place now for 16 years!  Wow!  I can not believe it has been that long!
My vegetable garden has been in a number of places since we moved in here, the original places have all yielded growing vegetables for a pasture.  SO I finally decided to make my vegetable garden a permanent place.  That would mean -garden boxes.  Below are a few of the first larger boxes.

We began with 4 of them.  They are 12 feet long and 4 feet wide.  We have 5 smaller ones in another place, which we started first.  I will show photos of those later.  These 4 boxes were began about 4 years ago.  Each year we need to add dirt.  The grass around them became a issue with keeping it mowed.  Although the boxes are wide enough for a push mower to get between them ---I did not want to continue to mow there.  The plan with the boxes is to as we age-build them taller (notice the vertical boards in the corners that we can continue to add boards around them)  that way as we get older, and can not bend as much, they will be taller for us!  The wide spaces between them, would even accommodate a wheel chair if needed.


We finally added the other 2 boxes, and put ground cover down with saw dust on top of the ground cover between the boxes.  That would mean that I only had to mow around the whole square of veg boxes, not between them! 

As the saw dust breaks down over the years, it will turn into soil and I can put it in the boxes. 
and here are the boxes today!  The saw dust between them are turning into dirt nicely.  This fall I will be adding it to the boxes and replacing it with new sawdust.  I also added saw dust around the exterior of all the boxes then we fenced it in with a small gauge fence to prevent the rabbits from getting into the garden! So we have 6 boxes here, but we have 4 that are closer to the house- and the 5 original ones which are smaller.


this is 3 of the older boxes.  they are 8 foot by about 3 foot wide.  You can see the onions and garlic here.  This is last years harvest.

this is the garden this year-you can see bush beans in the corner, and peas that will grow up on a wire shelf that I have placed in the garden for  plants to grow up on.  The chives are in bloom, there is also some garlic, and the white flowering plant on the left is cilantro. 

here is the same garden boxes -just a different view.  I have pea gravel around them, and a wooden fence to one side.  The rest of the fence is a chicken wire fence  (to keep those chicken rototillers out!)


This is the homemade gate for this garden, out of trimmed pieces of bushes that grow by the garden!  It means I can redo it yearly if needed!

This is the final 4 boxes.  They are the newest boxes. This is last years garden.  

Another view of the newer boxes (last years garden) 

Her they are this year...
volunteer tomatoes are coming up well !  (all heirloom tomatoes)
We will add 3 more small boxes at the end by where you see the wooden fence.  And then add the remaining wooden fence which will go to the corner of the house.  (we will add small wire fence on that to keep chickens, cats and bunnies out!)

here is another view, showing the other 2 boxes.  There is room in here for our table and chairs.  Ground cover down under that too, with sawdust, some day when we can afford it, we will put a stone patio down under the table and chairs.


and finally, here is the opening to this final garden on the other side of it, (You can see I have started some stone work at the door area) The 'gate' is a side to a crib.  I like to recycle things!